Two rooms.

Posted by Christy Miller on Saturday 29 June 2013. Filed under: , , , , , , , , , ,
No Comments »

I've already posted about bits and pieces of the nursery through my posts about the drawer liners, making a floor pouf, book slings, and a bunting, but there's a few other fun nursery tidbits to share as well.

My obsession with designing a nursery was fuelled by Pinterest. There's a billion great ideas, mostly DIY that piqued my interest, hence this other nine month project. But I am thrilled with the results - it is a little haven that I find very relaxing. Put a crying infant in it, and I'm not so sure, but I hope our son or daughter finds it calming as well.

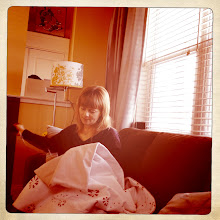
I love this crib. And yes, I know that you're not supposed to have anything in it with the baby.
One thing I wanted to try was a gallery wall, so I had begun collecting some fun prints for the nursery from here and there. In truth, there was only two from "here": a limited edition Whitehorse concert screen print created by Hardpressed Print Studio and a canvas print from Winners. The rest of the prints are from Urban Outfitters.


A pricey trip to the framer's later, all my prints were ready to hang. Luckily my husband is a math whiz and figured out how to hang these so that they would align properly.

Gallery wall above a vintage dresser, IKEA lamp, Aden + Anais change pad cover and crib sheet

Boolah Baguette for me or for the baby?
What I'm most happy about in the nursery was the chance to include things from many of my favourite local artists and businesses.

Like this wonderful little fella from Boolah Baguette aka Erin Weiss. She's brilliant and so are her creations which you can buy on Etsy or if you're lucky enough to be in Saskatoon, at the Flock and Gather Handmade Markets that are held twice a year.
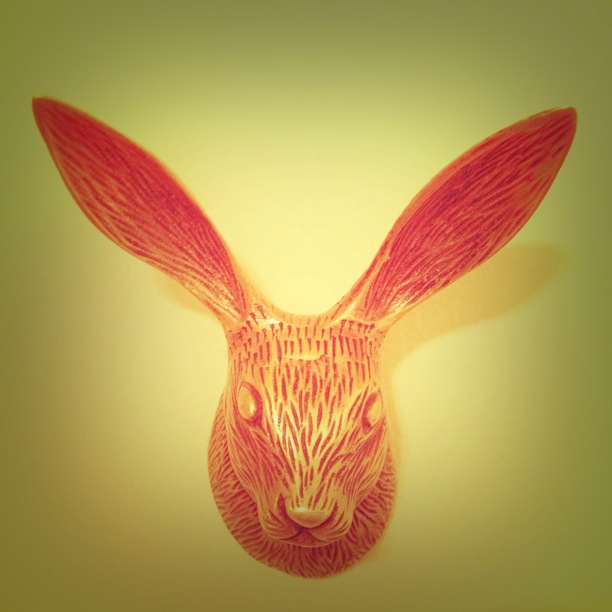
Shauna Buck illustrations, Anthropologie hooks

Another Flock and Gatherer that made their way into the nursery is Shauna Buck, a talented artist from Saskatoon. Her little birdie prints grace the odd little diagonal wall that you see first thing on your way into baby land.

Shauna Buck illustrations

Carole Epp pottery, ultrasound pic, original watercolour by Ashley Spires
Also back in the corner are these two hooks from Anthropologie that I love. These were the first things that I bought for the nursery and the last to be hung up.


 I have a small obsession with the Flock and Gather vendors, so not to be left out of the nursery is pottery maker Carole Epp, who made the darling plate and cup on the shelf. I was given these as a baby shower gift, but I'm not sure I will ever let baby eat or drink from them - they are too precious!

Also on the shelf is an original watercolour by my good friend Ashley Spires, children's book author and illustrator extraordinaire. I was deeply touched by her thoughtfulness in creating this original piece of work for baby. Ashley's amazing books also fill the book slings. You can buy her book Binky the Space Cat and other titles here.

Vintage brass ducks from Hiddenstitch
I nabbed these sweet vintage brass ducks from local entrepreneur Ricki Skoretz, who runs Hiddenstitch, a new home store in Saskatoon from where she operates her upholstery and furniture design business.

I also dropped some dough at TheBetterGood, our local eco-friendly goods store. I love this screenprinted pillow by Ferm Living.
Tiny train pillow by Ferm Living (purchased at TheBetterGood)
The fluffy circular rug was purchased online at the Home Depot and made a delightful journey from South Carolina to our floor in under a week (I'm amazed at how things get around the world so fast). 

The rocker is an old piece of furniture that my parents bought in the 80's that over time made its way into my home, likely at a time when I had no furniture. The little fox pillow nested into the nursing pillow is also from Urban Outfitters.


I made the curtains myself, not such an easy project when I was 6 months pregnant, crawling around on the floor trying to make sure that I was pinning and cutting straight.

Which leads me to room two, which is my other new favourite room in the house, my yoga / sewing room, which you can read about in my next post!

(Everyone loves a good cliff hanger, right?)

Bunting redux.

Posted by Christy Miller on Thursday 27 June 2013. Filed under: , ,
No Comments »

A few months ago, I made a name bunting for my niece Everleigh for her first birthday. I loved making it and so when my niece Claire turned three back in April I decided to put my bunting chops to work once again and make her one as well.


Happy Birthday Claire!

But I was still in the mood to sew.

I love the look of these so much, I knew I also wanted to make one for nursery to stretch across the wall above the crib. This was going to take a lot of triangles. I made a template and hunkered down.


However, the real secret to making these is Extra Wide Double Fold Bias, which costs about $2 per package at Wal-Mart.

Once you've got your triangles sewn, I trim the tops to make sure they are even and then pin them between the fold of the bias. Then I let 'er rip on the 'ol Pfaff.


I overshot the measurements on the bunting (surprise, surprise), so I ended up with a few extra feet of bunting, but better too much than not enough. I tied a bow at each end and nailed it into the corner where the wall meets the ceiling.

Another nursery project complete!


Full nursery reveal coming soon... (hopefully before the baby!)

Book slinga.

Posted by Christy Miller on Wednesday 26 June 2013. Filed under: , , ,
No Comments »

Here's another great Pinterest find that I couldn't wait to make for the nursery: book slings!

I've mentioned these to a lot of people and I always get asked the same thing: "What are book slings?" THESE are book slings:


Each sling is a piece of fabric literally "slung" between the two bars of a double curtain rod.

I followed these tutorials:

Brody's Book Slings
Penny Carnival


I chose this fun fabric from Periwinkle Quilting to match the curtain fabric. But, true to fashion, I didn't buy enough and had to improvise along the way by lining the slings with a complimentary teal fabric that I had kickin' around. Serves me right for trying to measure while I'm at the fabric store!


Other than that, these slings were pretty easy to make following the online tutorials and sewing straight lines.

The hardest part of this project was begging my husband to hang the double curtain rods - he loves freshly painted walls and doesn't want to hang ANYTHING up once the walls are painted if he can avoid it. But my persistent nagging does eventually pay off and now we have this nice little reading corner in the nursery, stocked with plenty of great books already!

Pouf!

Posted by Christy Miller on Sunday 23 June 2013. Filed under: , , , ,
No Comments »


I saw this pattern for a floor pouf on Design Sponge a long time ago and thought it would be a fun project. The nursery was a great excuse to try it out and I look forward to seeing baby use it as a little seat in the years to come.

Here's the pattern.

Like most projects, it was all about the prep work: procuring and choosing the fabrics, cutting, cutting, cutting, and making sure I had the right supplies for the job. Now that I own a 12" upholstery needle, watch out!

My colour palette
Since we don't know whether the baby is a boy or a girl, I've chosen teal as the accent colour for the room, and I was able to use a number of fabrics I already had on hand, as well as pull in other fabrics from the nursery projects I'd been working on. 

Because this project is for our own little one, I thought it would be special to use a few of my Grandma's vintage fabrics that my Mom gave me (fifth from the left and second from the right in the photo above).

Mass-producing the muslin lining

I made a sturdy template for the pie pieces by gluing the Design Sponge template onto a piece of cardboard and then tracing and cutting out all 48 pieces.

The design sponge directions are good, for the most part, but when you get to #5: Sewing the Wedges, here's a tip. 

It says: "Beginning at the wide end of the wedge shape, sew the layers together using a ¼” seam allowance. Sew a gradual curve along the angle at the base of the wedge (rather than sewing a distinct point). Stop the seam when you reach the point." 

I had to do this step again and really curve my seam as it reached the point of the wedge. You almost want the points to start to overlap with one another so that all of the wedges form a tight point. Otherwise when you attach the two sides, you'll have a hole in middle. (I did this twice and I still had a little hole in the middle that I had to patch before attaching the button and washer)

Bring the wedges as close together as possible.

Also pay close attention to step #8, where you sew the mirror version of the top half. Check and double check that you are sewing the wedges together in the right configuration so that you will have a matching bottom!


Seeing the pieces come together was extremely satisfying!


Then it was time to feed this beast. I ended up needing slightly more fibre fill than the pattern called for, but 3lbs would be a good start.


I spent a long time trying to even out the stuffing so that the pouf wouldn't be lumpy, but I think that the Design Sponge pouf was photoshopped, as there is just NO WAY to get it that smooth. It could also be on account of the fact that my fabrics were a mixture of broadcloth, cotton and a kind of canvas, so the stretch and pull of the fabric throughout was a bit off.

Because I forget my basics all the time, once the pouf was full I had to re-learn how to sew a seam closed, so I'm including this video here so that I know where to look when I inevitably need it the next time.

How to sew a slip stitch video.


If you try this project, you might be thinking that you could use some regular upholstery needle that you have around the house to attach the washers to the top and bottom. You can't. Once the pouf is filled with stuffing, you need a really long needle to be able to get all the way through. In fact, it took both my husband and I to hold the washers in place and push the needle through the pouf in a straight line through the middle.

Sidenote: It was because of my need for this obscure needle that I discovered Century Textiles on this project. This is a little hole in the wall of a place, but now I know where to find some of the weird supplies I need (like boning for another project I was planning).

Once your washers are attached, all you need to do is attach some decorative buttons to cover them and you're done. Pouf! Just like that.

Just chillin' out in the baby's room.