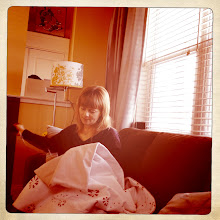
The last stitch.
Posted by Christy Miller on Monday 18 March 2013. Filed under: beginner quilt, free motion quilting, Periwinkle Quilting, quilting, sampler quilt1 Comment
I know how climbers feel when they take their last step to the peak of Mount Everest.
I know how it must have felt to drive the Last Spike in the railroad that unified Canada.
I know how a runner feels at the end of a marathon. Or better yet, the end of the Iron Man.
I know this because I have finally finished my first quilt. More than a project, more than a climb, more than a race, it was a labour of love (and determination).
I have a whole new respect for those little 'ol ladies displaying their quilts at the mall or the craft sale. Those are some hard core grannies who deserve our admiration and respect. Because quilting is not a project for pansies. Or the faint of heart. Or people who have anything else to do with their time.
Here it is:
I'm more than pleased with how it turned out, but I grossly underestimated the amount of time it would take once the top was assembled. The "quilting" is actually what I would have called "top stitching" prior to this class, and it's what gives a quilt its texture and reinforces its personality. After many YouTube videos and lots of practice, I attempted some free motion quilting on part of the quilt in a popular meander style. Or did I? You be the judge.
There was a big difference between practicing on a one foot square and doing the actual machine stiching on a lap-sized quilt.
Eventually I settled on "stitch in the ditch" quilting and a simple four-pointed flower pattern for the setting squares and the border. This nicely pulled out the inner border fabric pattern as well. I had to give up on free motion quilting as I just couldn't get the rhythm right (which throws your stitch length all out of whack).
The final challenge was hand stitching the binding- another multi-night mammoth challenge. But again, the result is beautiful (if I do say so myself) and I think not bad for a beginner quilt.
It will go well in my living room as a warning against future big projects!
P.S. In case you missed it, you can read my first post about my quilting project here.
I know how it must have felt to drive the Last Spike in the railroad that unified Canada.
I know how a runner feels at the end of a marathon. Or better yet, the end of the Iron Man.
I know this because I have finally finished my first quilt. More than a project, more than a climb, more than a race, it was a labour of love (and determination).
I have a whole new respect for those little 'ol ladies displaying their quilts at the mall or the craft sale. Those are some hard core grannies who deserve our admiration and respect. Because quilting is not a project for pansies. Or the faint of heart. Or people who have anything else to do with their time.
Here it is:
There was a big difference between practicing on a one foot square and doing the actual machine stiching on a lap-sized quilt.
Eventually I settled on "stitch in the ditch" quilting and a simple four-pointed flower pattern for the setting squares and the border. This nicely pulled out the inner border fabric pattern as well. I had to give up on free motion quilting as I just couldn't get the rhythm right (which throws your stitch length all out of whack).
 |
| I made a template for the flower border out of an empty cookie box. Tough work, eating all those cookies. |
It will go well in my living room as a warning against future big projects!
 |
| Cash likes it. |


