I'm home after a three-week holiday in France and Italy and so happy that it's still summery weather in Saskatchewan! Which is great, because I have a few summertime projects to post about.
Two VIB's (Very Important Babies) were born over this past summer: our beautiful niece
Lilah Caroline (aka Rosie or Blu-ey*) came onto the scene in July and the charming
Sina Rose-Ann came to the party in early August.
Your niece and your best friend's first baby call for some serious gifting.
Luckily, my Mom and I had been "oohing" and "ahhing" at the recipes coming out from the
Moda Bake Shop for some time, including this one for a
Cathedral Window Baby Playmat. I gather that people don't like to hold their children constantly, so rather than placing them on a pile of broken glass, they can rest them on this delightful mat!
This project looked like so much fun, I just had to make one for each of the new babes. I wasn't disappointed - I had a blast piecing these together and was very happy with how they turned out.
 |
| Sina's is on the left, Lilah's the right |
 |
| Even the backside is pretty! |
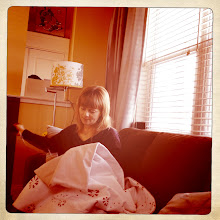
I had the opportunity to spend a weekend working on one of them at the lake with my product tester, the lovely Everleigh:
 |
| This playmat is baby approved! |
 |
| Cozy for adults, too! |
Some tips if you decide to take this on yourself (noting the step in the Moda pattern, if applicable):
 |
| I love you, rotary cutter. No, I'm not exaggerating! |
- Buy an Olfa Rotary Circle Cutter. I think it only ended up being about $15 (with a coupon from Michael's, of course), so it is well worth the investment. I have no idea how you would get perfect circles with just a regular cutter and it saves you a tonne of time. Bonus: it's fun to use!
- Steps no. 1 and 2: Once you get a sense of where to place your cutter on each piece of fabric, you won't need to fold, press and mark each square before you cut a circle out of it (also a time saver!)
- Steps no. 6 and 7: Once you've placed them in a configuration you like, take a photo of it. It gets hard to remember what goes next to what once you start sewing them into rows. Picking a nice configuration (front and back) was a real challenge for me, being design challenged!
 |
| Take a picture of your layout |
- Step no. 9: Your sewing machine may already have a walking or quilting foot (and like me, you don't know it). The great gals at the Pfaff store told me that it's the black foot behind the regular sewing foot that you can lower and raise as needed. By golly, they were right!
- Step no. 13: Make sure your square template is perfect, perfect, perfect! It really throws your alignment off if it's not a perfect square, so be careful with this step.
- Step no. 20: I didn't have an iron handy when I was finishing one of the mats, so I had to pin down the flaps before top stitching them. This actually turned out way better than ironing them down, so if you have the extra time (I had rainy day lake time), I would suggest this.
 |
| Hard at work |
*In utero, Lilah was called "Rosie" or "Blu-ey" by her elder sister Claire (my brother- and sister-in-law thought they might pay homage to Beyonce and Jay-Z's baby, as they are such huge fans). Rosie hasn't stuck, but much to the chagrin in my in-laws, Blu-ey has.
 |
| Lilah - one day old |
 |
| Sina - a week old |