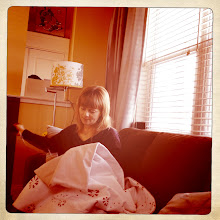
Nobody puts baby in the corner.

Posted by Christy Miller on Wednesday, 29 May 2013. Filed under: , ,
No Comments »

Now begins a series of posts about creating the nursery- a project that's been underway for about 8 months now. When we found out that we were expecting, I started researching beautiful nurseries on Pinterest. My husband started researching life insurance. We're a good match.

The first thing we had to do was get rid of all the stuff that was in the future nursery - no small task. There was mountains of books on a too-big bookshelf, an old desktop computer and computer desk, a closet full of miscellaneous clothes, and all of my crafting and sewing supplies. Believing that there's a "place for everything", I spent many months seeing these items to the right charities, friends and Kijiji ads. We got rid of a tonne of stuff and it felt great.

With the room empty and repainted, it was time to start from scratch. Given that it's a pretty small room in a compact house, it was important that we chose things carefully. That said, I fell in love with this crib from Dwell and when it went on sale over Christmastime, I made my first nursery purchase. It was a splurge, for certain, but unless our kid gnaws on it, I think it will have good resale value.

However, I drew the line at purchasing the matching dressers from Dwell, thinking that I could find something second-hand to match. While describing what I was looking for, my wonderful friend Susan mentioned that she had seen something similar at a local thrift shop. I picked up these little beauties at Village Green - $200 for the pair.


I'd seen some neat posts Pinterest for lining drawers with fabric and decided to give it a whirl on the dressers to give them a new life.

To start, I cut each of my drawer pieces roughly to size. Once the pieces were cut, I started looking around for fabric stiffener, but had no luck. That's when my Mom mentioned that you can make fabric stiffener the old fashioned way - with household ingredients!

Here's the recipe I found for a non-permanent hard finish.

Combine 1/4 c. cornstarch and 1 1/2 cup cold water, mix until smooth. Cook over medium heat until thickened and translucent. Cool before using.
This kinda worked. I let it cool completely and found out that it hardened to a jelly-like substance. I proceeded to re-heat the jelly mixture and added more water as it warmed up. It ended up being a lumpy, watery, jelly consistency (gross!) I threw caution to the crafting wind and decided to see what would happen if I used it anyways. I started dipping my fabric pieces into the goop.

The instructions then say to "gently squeeze out excess solution being care not to twist or wring the piece, then blot excess starch from fabric using a clean cloth or paper towels. Shape according to pattern instructions."


There was a lot of goop on the fabric, so I don't know how "gently" I squeezed it out, but I got out as much as I could. Because I was working with large pieces, I laid each piece out on an old towel and rolled them up in that. Then I let the rolls dry overnight.

The next morning, the fabric was still slightly damp, which was perfect, as I wanted to be able to iron it before it dried completely. I laid it on an old pillow case so as not to get my ironing board all covered in starchiness.

The ironing helped to dry the fabric the rest of the way, and then I stood back in wonderment: this actually worked! The fabric was as stiff as a piece of lighweight cardstock. Very cool!

Next, I pre-cut my fabric so that it would line the bottom and sides of the drawers. To do this, I made a template out of pattern paper and then traced that onto the fabric. The template for something like this is essentially the rectangular size of the drawer with a square taken out of each corner so that the fabric meets instead of overlaps.

From there, it was a process of fitting each piece snugly to a drawer and then holding it in place while I glued it down. I used large bull clips to hold each side in place and then lifted one side at a time to run a bead of super tacky craft glue along the seams and along the top edge of the fabric. After a little final smoothing of the fabric, I set the drawers to dry.

I know that drawers are usually full and generally closed, but I love knowing that this happy fabric surprise is waiting inside!


Baby drawers for baby things.


The last stitch.

Posted by Christy Miller on Monday, 18 March 2013. Filed under: , , , ,
1 Comment

I know how climbers feel when they take their last step to the peak of Mount Everest.

I know how it must have felt to drive the Last Spike in the railroad that unified Canada.

I know how a runner feels at the end of a marathon. Or better yet, the end of the Iron Man.

I know this because I have finally finished my first quilt. More than a project, more than a climb, more than a race, it was a labour of love (and determination).

I have a whole new respect for those little 'ol ladies displaying their quilts at the mall or the craft sale. Those are some hard core grannies who deserve our admiration and respect. Because quilting is not a project for pansies. Or the faint of heart. Or people who have anything else to do with their time.

Here it is:

I'm more than pleased with how it turned out, but I grossly underestimated the amount of time it would take once the top was assembled. The "quilting" is actually what I would have called "top stitching" prior to this class, and it's what gives a quilt its texture and reinforces its personality. After many YouTube videos and lots of practice, I attempted some free motion quilting on part of the quilt in a popular meander style. Or did I? You be the judge.

There was a big difference between practicing on a one foot square and doing the actual machine stiching on a lap-sized quilt.

Eventually I settled on "stitch in the ditch" quilting and a simple four-pointed flower pattern for the setting squares and the border. This nicely pulled out the inner border fabric pattern as well. I had to give up on free motion quilting as I just couldn't get the rhythm right (which throws your stitch length all out of whack).
I made a template for the flower border out of an empty cookie box. Tough work, eating all those cookies.
The final challenge was hand stitching the binding- another multi-night mammoth challenge. But again, the result is beautiful (if I do say so myself) and I think not bad for a beginner quilt.

It will go well in my living room as a warning against future big projects!

Cash likes it.
P.S. In case you missed it, you can read my first post about my quilting project here.

A banner day.

Posted by Christy Miller on Thursday, 7 March 2013. Filed under: , , ,
1 Comment

Where does the time go?

My sweet niece Everleigh is already one year old!

I heard that Ev recently moved into a different bedroom, so I thought a name banner to decorate her new digs would be a fitting birthday gift.

There are quite a few tutorials out there for bunting flags, but none were quite what I was looking for, so I came up with this on my own.

This is a project that you could easily complete in an afternoon.

Supplies:
  • Layer cake pieces (10" x 10" pieces) in a design of your choice (I used Oh Deer by Moda, which I love)
  • Contrasting fabric for the letters
  • Contrasting thread
  • Bias tape in matching or contrasting colour (I chose a medium size bias tape, not quilt size)
Since Everleigh has 9 letters in her name, I needed 18 pieces to make the bunting double-sided. I found that layer cake pieces worked perfectly for this project, and you can get two pieces out of each 10" x 10" square. (You might want to make a paper template to trace from like I did)


Once I had my 18 pieces, I arranged them in an order I found appealing (front and back).

I found a free font that I liked called Creative Block BB from 1001freefonts.com and typed Ev's name into an 8.5 x 11 document at 250 points. I upsized the document during printing to an 11 x 17 document.

Then, I set the contrasting letter fabric on top of the letter template page and traced the outline of each letter directly onto the fabric.

I applied fusible interfacing to the back of the letter fabric and then cut out each letter. Then, I applied the letters to each of the flags.

After that, it was time to practice my machine applique stitching. I created a sample flag to practice on, but I also came across this great tip for machine appliqueing so that you get a nice clean corner.


You'll want to increase density of your zig zag stitch for appliqueing as well.

It was while I was appliqueing the letters that I thought, "Whew! Everleigh has a LOT of letters in her name!

Once the letters were sewn on, place the right sides of each flag together and sew with a 1/4" inch seam.

Turn the flags carefully (or use a bamboo turner) and then give each of the letters a spray with speed starch before a ironing them flat.


Leaving at least a foot long tail on each end of the bias tape, pin each of the letters into the inside fold of the bias tape and sew using a zig zag stitch.


Tuck the ends of the bias tape in and stitch in place.

And voila! Admire the results:


Pop it in the mail - and wait to hear from...


...another satisfied customer!